
Much of our MLab research involves prototyping historical objects and experiments. This approach allows us to explore aspects of an object or experiment that we could not experience through two-dimensional interaction with written accounts, patents, and images. By interacting with 3-D prototypes, we identify flaws in our knowledge and possible gaps in historical designs. With our Wearables Kit, this experience led us to suspect exaggeration in descriptions of an electro-mobile skull stick-pin from 1867. While prototyping early magnetic recording experiments (1898), we’ve identified various important details missing from historical accounts.
Throughout this prototyping process, we’ve used a 3-D scanner (or structured-light scanner) to produce models for experimentation. For the skull stick-pin, we made and then scanned a wooden skull as a model for fabrication in acrylic. For the magnetic recording experiments, we scanned late-19th-century telephone receivers and transmitters. Using those scans, we reduced the 3-D models to 2-D parts that we cut with a laser and then assembled back into wooden iterations of the originals. For other projects, we are making casting moulds by splitting the digital scans in half and then either fabricating them or carving interiors with various CNC machines. We can then fill the moulds with an array of materials. This approach allows us to retain more nuanced surface features, including grooves or cracks. It also allows us to work with materials such as metals.
Unfortunately, the scanning process doesn’t always go as easily as planned. For instance, scanners such as ours (an LMI HDI 120) frequently face difficulties picking up smooth textures, including metal or plastic. As you can see in the image below, the initial scan saw almost nothing when we first scanned the telephone transmitter’s plastic casing.
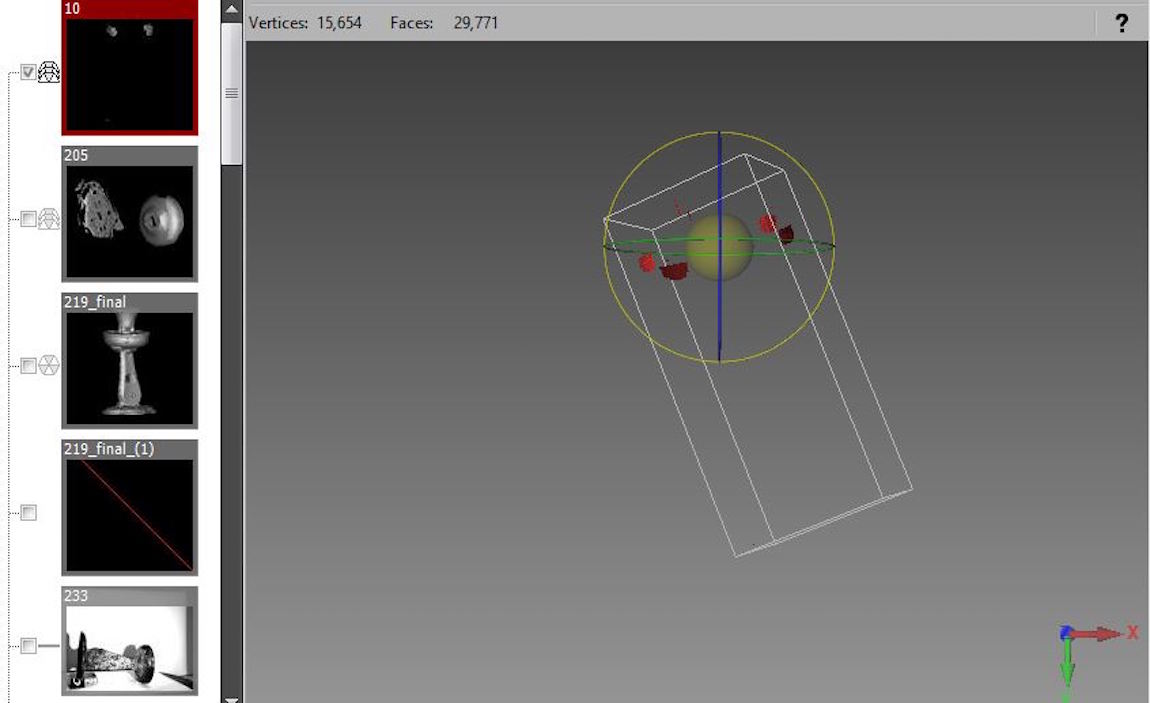
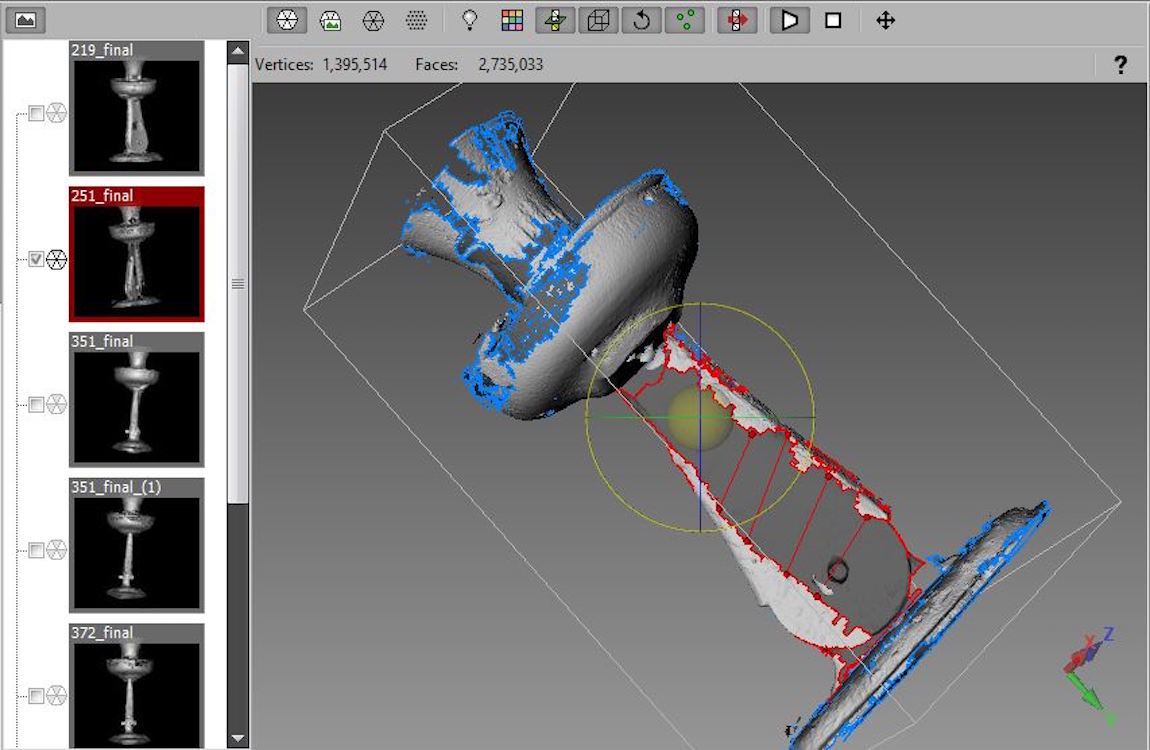
One way to address this problem is to add texture by dusting the object with talcum powder, for example. If we are using a rotary table, then we also place the object on its side or at another angle. This way, the light hits it from a slightly different direction. As the image below suggests, I placed the transmitter on a piece of paper to add contrast. While this approach resulted in more angles, it also scanned the paper as though it were part of the transmitter. Since I didn’t want the paper to be part of my final scan, I selected and deleted the sections of the object that didn’t seem to belong. In the image, the section highlighted in yellow is about to be deleted. Moments such as this one remind us how 3-D scans aren’t exactly “copies” of originals. They are edited throughout the remediation process.

Software such as FlexScan3D (which we use often) also allows you to combine several partial scans to fill missing parts. However, in some cases the software will consistently miss the same spots on the object. In such situations, we use the software’s “fill” option, where you bridge specific sections to indicate where a wall should go. In the image below, I’ve placed several bridges across the midsection of the transmitter.
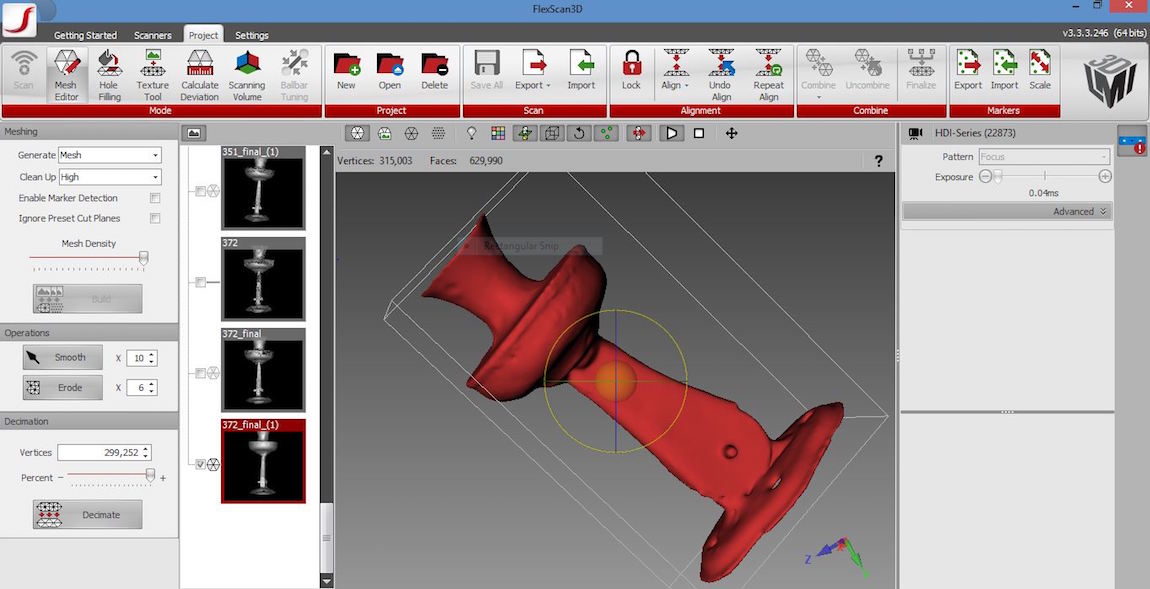
If the holes or occlusions prove too difficult, then we sacrifice some precision by applying the “smooth finish” function. While the object retains the same shape and most of its features, some intricate details are lost. Below, you can see a finalized version of the telephone transmitter where I applied a smooth finish.
By digitizing 3-D objects, we’re able to not only remake them in a variety of ways but also create files that allow others to access remediations of historical objects and then interact with them without concerns about damaging surfaces, forms, or composition.
Post by Katherine Goertz, attached to the KitsForCulture and Makerspace projects, with the fabrication tag. Images for this post care of Katherine Goertz and the MLab.