
While modeling and building the case for our early wearable kit (part of our Kits for Cultural History series), we aimed to balance digital 3D design with a tangible aesthetic, accessibility with meaningful interaction, and carefully planned organization with options for alteration. The result is an open-source case that can be adjusted digitally and also produced using equipment at hand. While we plan to make our files for the kit accessible online, this post is not intended to provide instructions for building the kit (that is, “do not try this at home”). Instead, I will describe aspects of our workflow in the MLab and share some insights.
As I outlined in a previous post, we used examples of jewellery cases (or jewel caskets, as they were often called) from the Victorian period to inspire our design of the kit’s container. Since the content of the kit is electro-mobile jewellery, a jewellery box makes sense not only thematically but also for arranging small parts, intentionally structuring access to elements of the kit, and keeping everything secure. We began this process by sketching cases inspired by various jewel caskets.
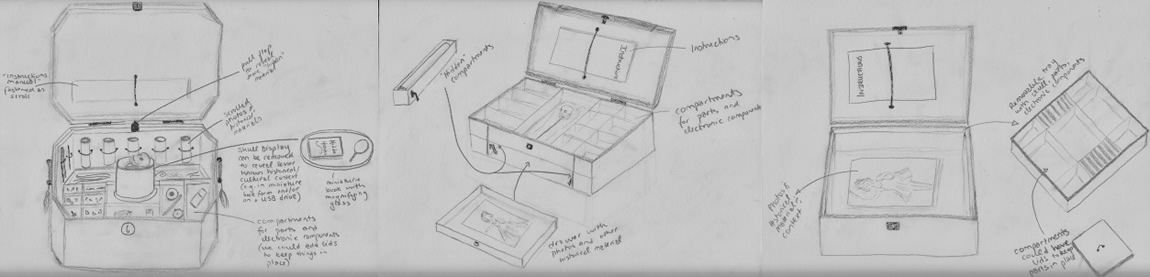
Sketches of a Victorian jewel casket care of Nina Belojevic and the MLab
Once we decided what components we wanted to comprise the case, we began working through several iterations of the design in Rhino 3D. While creating the 3D model, we wanted to represent the aesthetic intricacies of a Victorian jewel casket, which could be manufactured using some of the CNC (computer numerical control) equipment we have in our Digital Fabrication Lab. Since such equipment can be difficult to access (e.g., due to costs, training, and matters of infrastructure), we also wanted to make it possible to render a simpler version of the box using hand tools. Although a simpler version may lack the intricacies of Victorian caskets, many details can be added to the base model during post-production. These details include illustrations, engravings, and hardware.
In fact, when designing our base model, we did not include the details for a finished box. As such, that model does not include any decorative elements. Its surfaces are rather minimalist, not Victorian, in their design. To this model we add engravings and other features corresponding with Victorian caskets. These features complement the guides for the early wearable kit, but—with the simple base model—we also want to encourage audiences to create their own variants or editions.
As you can see, the Rhino model comprises the basic elements of the case. It shows the rounded and beveled edges that follow a Victorian aesthetic, and it has been rendered to the size we require for the final kit. Again, details can be added during production and post-production: prior to fabrication, the desired box material can be selected; different types of silk or satin lining can be inserted; surface illustrations can be painted on or engraved; and hinges, ribbons, or knobs can easily be added.
For our first iteration, we decided to laser-cut the jewellery case with an Epilog Helix 40-watt laser. We cut the external components of the case from 6mm baltic birch, and the internal components consist of 3mm baltic birch.
While this prototype is a simpler, flattened version of the 3D model created in Rhino, such simplicity allows us to quickly construct materials that we can user-test with multiple audiences. Since we designed the case to encourage audiences to move through the kit in certain ways, explore it, immediately find some components, and search for other components, this user testing is essential to our research. For instance, we have included two “hidden” compartments in the bottom section of the kit. They hold historical materials and require some digging to locate. One compartment contains schematics and technical articles about the electric jewels from the period; the other compartment contains texts on jewellery etiquette as well as images of some of the women who modelled electro-mobile jewellery. User testing tells us whether these hidden compartments do in fact afford certain arguments about early wearables, or if the kit design should be revised and improved.
After cutting all the pieces, we stain them to give them a richer colour. Although we used baltic birch, which can be cut very easily with a laser, we wanted to follow the look of the Victorian jewel caskets we found, which mostly consisted of darker materials (often of lavish woods, such as mahogany and rosewood). To achieve a similar look, we chose a walnut wood stain. We then assembled the boxes using wood glue, clamps, and hinges.
We are currently finalizing all of the kit’s various parts, such as the guide, the milled skull, jewellery pin components, and an electromagnetic mechanism for moving the skull’s eyes and jaw.
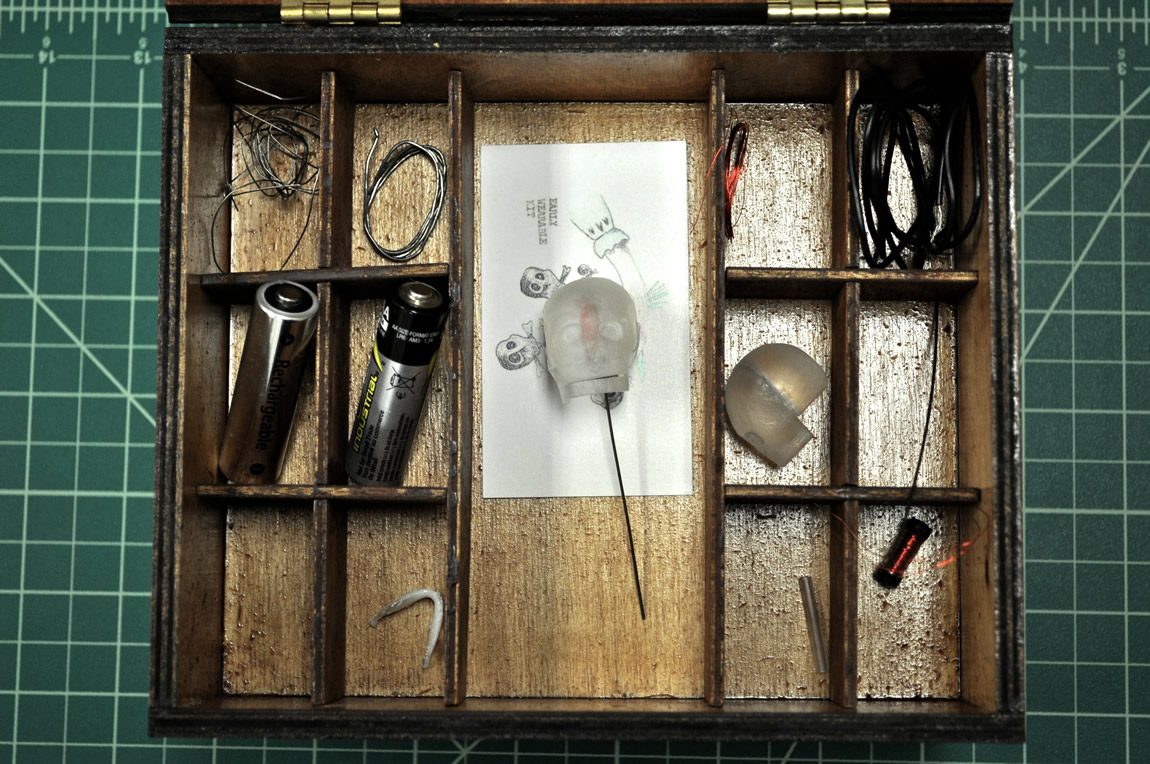
Image of an early wearable kit care of Danielle Morgan and the MLab
While we plan to manufacture physical kits that can be mailed, we will—as I suggested earlier in this post—also make available digital files for all components of the kit, including the case. We are eager to see not only how our audiences will engage the complete kit, but also how they might modify, realize, and construct the kit using the digital models, descriptions, and historical media we provide. After all, our goal is not to tell people how early wearables were built. It is to prompt them to prototype versions of history through today’s materials and technologies.
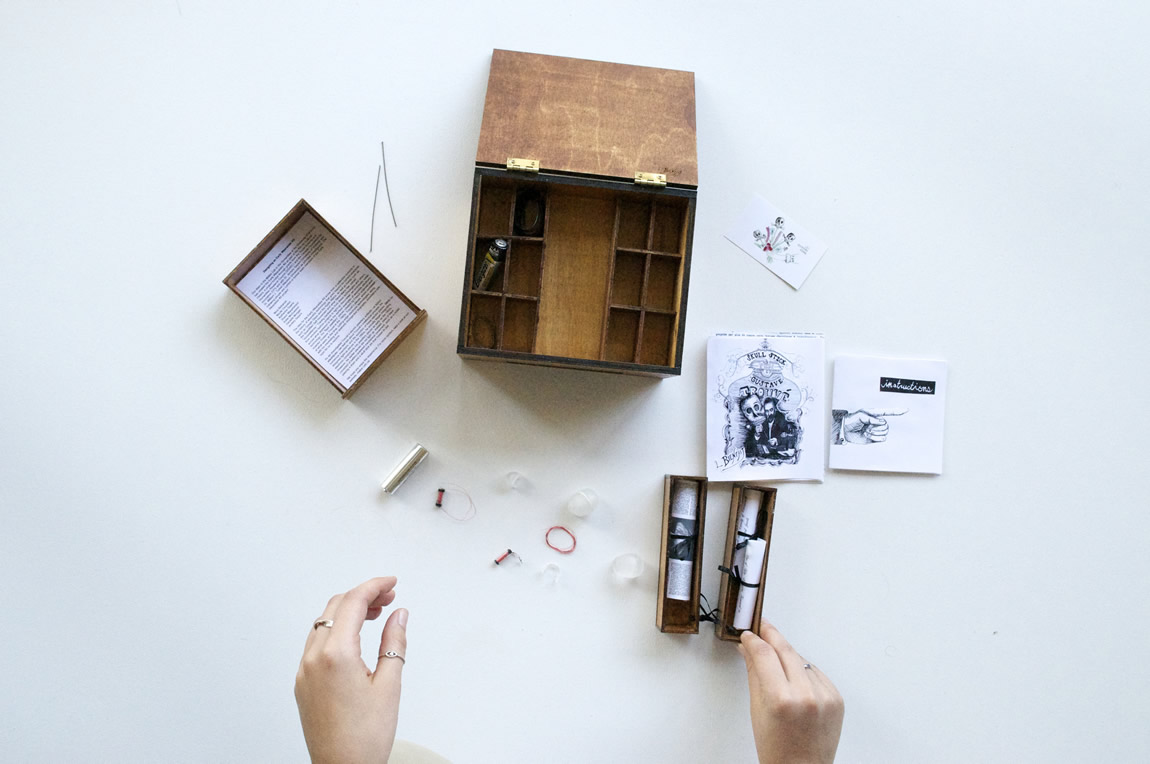
Image of an early wearable kit care of Danielle Morgan and the MLab
Post by Nina Belojevic, attached to the KitsForCulture project, with the fabrication and versioning tags. Images for this post care of Danielle Morgan. Sketches and videos created by Nina Belojevic.